Ultra-Detailed Llama2 Deployment Tutorial, Personal GPT Experience Guide
This is the complete process I’ve compiled for deploying Llama2. I hope it helps engineers with similar needs. If you find it useful, please feel free to share. Thank you.
This tutorial is applicable for deploying and experimenting with the LLaMA2 model in a Linux & Conda environment. To read this tutorial smoothly, you should have some understanding of Linux systems and command line operations.
This tutorial is mainly divided into two parts. The first part explains how to download and install Anaconda on your system. The second part guides you through the application, download, and demo running process of the Llama2 model.
Step One: Install Conda Environment
Anaconda is an open source Python distribution that provides a suitable toolkit for scientific computing and data science. It is commonly used for managing development environments and packages. This section shows us how to install the Anaconda environment.
Download Anaconda installation package
Navigate to your home directory and download the Anaconda installation package. You can find the corresponding version on the Anaconda website, copy the URL, and then use the wget tool to download it.
Install Anaconda
After downloading, you should be able to see the Anaconda installation package you downloaded in the current directory using the ls command. The file is usually in the form of Anaconda3-xxxx.xx-xxxxxx.sh. Then, use the bash command to install the installation package.
bash bash Anaconda3-2022.10-Linux-x86_64.shPress Enter to read the agreement, continue until prompted to accept the agreement, type ‘yes’, and then press Enter without any further requirements for the installation path. After the installation is completed, you will be asked whether you want to initialize. You can type ‘yes’ to proceed.
Environment Variables
You can check if Conda has been successfully installed by using the command conda -V. However, at this point, the system is likely to indicate that the Conda command is not found. You need to activate the modified environment variables to resolve this issue.
bash source ~/.bashrcAt this point, the command prompt should display (base). Now, if you run conda -V, you should be able to see the system output the version number of Conda.

At this point, we have successfully installed and configured the Conda environment.
Step Two: Llama2 Application & Deployment
Llama2, released by Meta as an open-source large language model, can be used for free for academic research or commercial purposes. This chapter mainly describes how to apply for, deploy, and run the Llama2 model’s demo on a local (or your own remote server) Linux system.
Applying for Llama2 License
To use Llama2, you need to apply for a license from Meta. Otherwise, you won’t be able to download the Llama2 model weights. Application website: https://ai.meta.com/resources/models-and-libraries/llama-downloads/
After entering the corresponding information, especially your email address, check the “I accept the terms and conditions” at the bottom of the page, and then click “Accept and Continue”. After some time, you will receive an email. In the email, there will be a long link starting with https://download.llamameta.net/*?. This link contains the verification information you will need when downloading the model later.
Creating a Virtual Environment & Installing Dependencies
In this step, we need to create a virtual environment using Conda to run the Llama2 model. First, run the following command to create a virtual environment named “llama” with Python version 3.10. It is recommended to install Python version 3.9 or higher.
bash conda create -n llama python=3.10After the prompt “Proceed ([y]/n)?”, enter ‘y’ and press Enter to automatically create the environment. Wait for the creation to complete. You can then use the following command to view the currently available environments and enter the ‘llama’ environment:
conda env listTo activate the ‘llama’ environment, use the following command:
conda activate llamaAfter successful execution, the command prompt will change from (base) to the name of the target environment, in this case, (llama). This change indicates that you are now working within the ‘llama’ environment.
Next, in your code folder, use the following command to clone the Llama2 GitHub repository:
git clone https://github.com/facebookresearch/llama.git
After running the command, you will see a new folder called ‘llama’ inside your current directory. This folder contains the definition files for the Llama2 model, two demos, and scripts for downloading weights, among other things.
Next, navigate into the ‘llama2’ folder and use the following command to install the dependencies required for running Llama2:
pip install -e .The time required for this step depends on your internet connection speed and might take a while. Once this step is completed, you will have the software environment necessary to run Llama2.
Downloading Model Weights
In this step, we will use the “download.sh” script from the ‘llama’ folder we cloned from GitHub to download the necessary model weights. Currently, Meta has released three scales of models: 7B, 13B, and 70B. Each scale has both the original version and the chat version. The chat version is tuned and reinforced to human conversational skills in the reinforcement learning phase through human feedback (RLHF).
To download the model weights, follow these steps: Navigate to the ‘llama’ folder path and run the download script.
bash bash download.shAfterward, the script will prompt you to verify the URL. Copy the long link from the email you received and paste it here. Then, enter the model you want to download (or simply press Enter to download all models).
The model weight files are quite large, with the 7B model being approximately 12.5GB and the 13B model requiring 24.2GB. Downloading these files will take a considerable amount of time due to their size.
Running Model Demos
After completing the aforementioned steps, you can run the Llama2 model easily. The ‘llama’ folder provides two demos for running: one is for sentence completion tasks based on the original model (example_text_completion.py), and the other is for conversation tasks based on the chat model (example_chat_completion.py).
For example, with the 7B model, the scripts for running both tasks are as follows:
# Sentence Completion Task
 torchrun --nproc_per_node 1 example_text_completion.py \     --ckpt_dir llama-2-7b/ \     --tokenizer_path tokenizer.model \     --max_seq_len 128 --max_batch_size 4
 # Conversation Generation Task
 torchrun --nproc_per_node 1 example_chat_completion.py \     --ckpt_dir llama-2-7b-chat/ \     --tokenizer_path tokenizer.model \     --max_seq_len 512 --max_batch_size 4
Explanation of the commands:
torchrunis a command-line tool provided by PyTorch for distributed training.--nproc_per_node 1: This option specifies using 1 GPU per node, meaning each training node (which can be a single GPU or multiple GPUs) uses only one GPU.--ckpt_dir llama-2-7b/and--tokenizer_path tokenizer.modelprimarily specify the paths of the model and tokenizer in use. These can be hardcoded in the corresponding .py file to avoid repeated specification.- The input for text completion and dialogue is already defined in the code files. If you want to input your own text to the model, you can modify the corresponding variables in the code files. For example, in
example_text_completion.py, you can modify thepromptslist variable, where each element is a sentence to be completed.
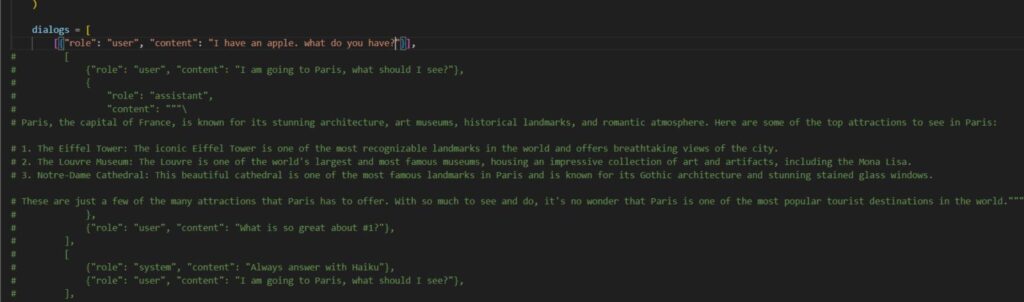
Similarly, for specific dialogue tasks, you can directly modify the dialogs list in example_chat_completion.py to test the model with the statements you want to input. Each dictionary element in the list represents a dialogue. ‘role’ indicates the identity and has three options: ‘system’, ‘user’, and ‘assistant’. ‘content’ represents the text content of the dialogue.
If it’s a simple sentence input, you can directly add a dictionary with ‘role’ set as ‘user’ to the list. For multi-turn input, it needs to be in the format of ‘u/a/u/a/u…’ where ‘u’ represents ‘user’ and ‘a’ represents ‘assistant’. The specific meanings and usage of the three options in ‘role’ are as follows:
- ‘system’: This can be understood as a requirement for generating content for the system. When fed to the model, it will be automatically concatenated as a prompt to the subsequent input dialogue text. For example, you can request the system to answer using specified content or a specified style. This can only be specified in the first element of the input list. If ‘system’ is not specified, the system will add a default prompt, the content of which is as follows:
"""You are a helpful, respectful and honest assistant. Always answer as helpfully as possible, while being safe. Your answers should not include any harmful, unethical, racist, sexist, toxic, dangerous, or illegal content. Please ensure that your responses are socially unbiased and positive in nature.
 If a question does not make any sense, or is not factually coherent, explain why instead of answering something not correct. If you don't know the answer to a question, please don't share false information."""
‘user’: User’s input text. ‘assistant’: System’s response text, used only when constructing multi-turn conversations.
Here is a simple example:

Step Three: Using the Hugging Face Version of Llama2
If you are already familiar with and accustomed to using models and training methods from Hugging Face, there is also a version of Llama2 available for use on Hugging Face.
Submitting the Application
Please note that using Meta’s official Hugging Face version of the Llama2 model also requires applying for a verification link from Meta (as detailed in step two). Additionally, you need to create an account, log in to the Hugging Face website, visit the Meta Llama 2 page, agree to the user agreement, and submit your application. Then, wait for Meta to review and approve your application.
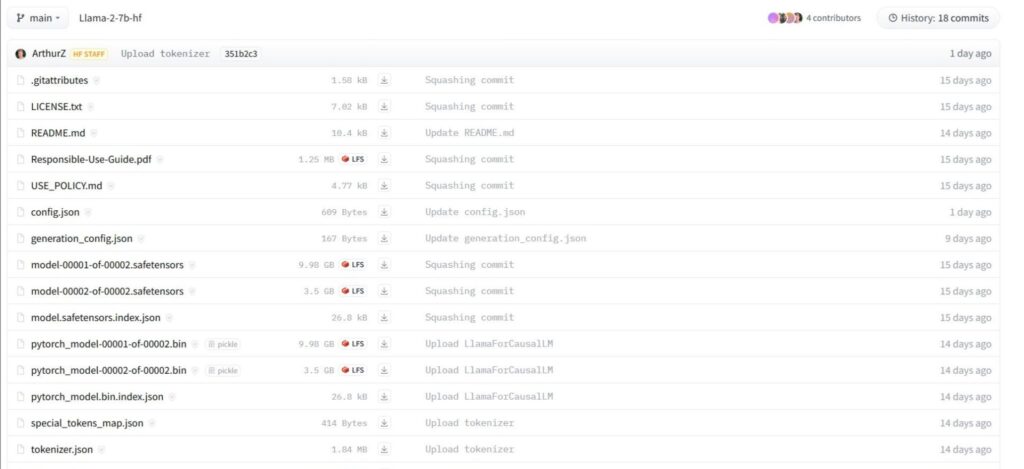
After your application is approved, you can find and download all the relevant files on the model page.
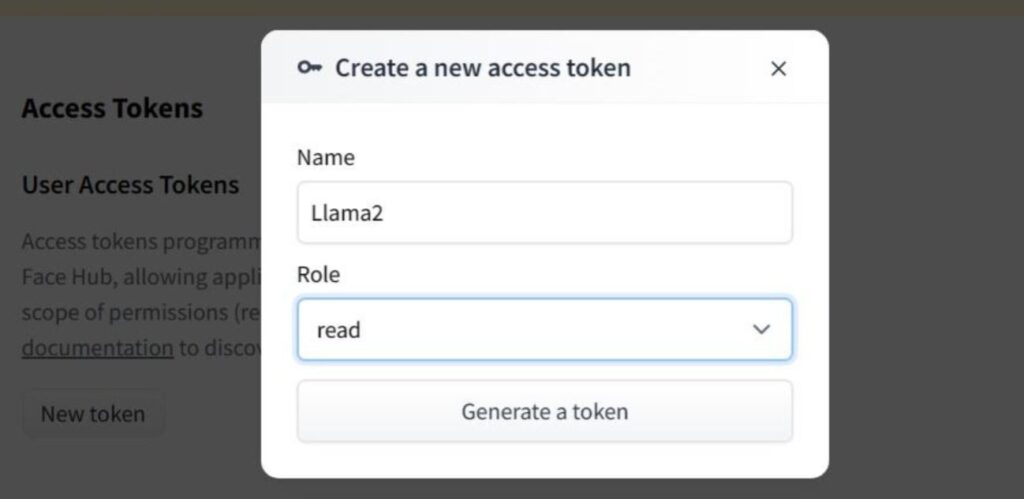
Generating Verification Token
To access authorized Hugging Face models on the client-side, after logging in to Hugging Face, you need to generate a token on the token generation page for verification purposes.
Log In
There are two ways to log in on the client-side. One way is to enter huggingface-cli login in the command line, then input the generated token (similar to entering a Linux password, the input or paste won’t be visible). The other method is to log in through code using the huggingface_hub.login() function.
About the Llama’s Current Ecosystem you can read this post: https://metawise.top/ai/34/